Welcome to Kroon Digital, your number one source for all computer's and cellphones. We're dedicated to providing you the best services, with a focus on dependability. customer service, and cyber café.
We're working to turn our passion for tech into a booming online store. We hope you enjoy our products as much as we enjoy offering them to you.
Sincerely,
Victor Murphy
Windows 10/11 is speedier than the previous versions of Microsoft’s desktop operating system, but you can still optimize its performance. Learn how to make your Windows 10/11 PC run faster with our tips.
As PC hardware continues to speed up, so does software, and Windows 10 is no exception. This is especially true of startup time: If you upgrade from Windows 7 or earlier, you’ll be pleasantly surprised by how fast your machine is ready for action. There are other performance factors to consider after you’re up and running, however. Even the latest, shiniest Windows version isn’t immune to slowdowns.
The problem with a lot of Windows speedup stories is that they tell you to turn off some of the operating system’s more-fun features, such as visual animations. Most of our tips show you ways you can speed up your Windows 10 system without compromising its appearance and functionality. Most are also free, but some involve spending a little cash on software or hardware. For people with older, low-power machines who want a speed boost but don’t care about extra goodies, a couple of the tips towards the end do boost system performance at the expense of visual bling.
Note that you should beware of those “Speed Up Your PC!” ads for registry cleaners, which often lead to malware. Microsoft categorically does not support the use of registry cleaners for Windows 10 and 11.
Something that is recommended is to keep your OS version up to date. This may seem too obvious to include below as a separate step. Periodically head to the Settings app’s Windows Update section to see whether there are any security and reliability updates you should install. Your PC may run faster after one of these, since they also can include hardware driver updates. Do this even if you don’t want yet want a big feature update—you can delay those major updates in the same section of Settings.
How to install Windows 10 onto a new computer using a USB drive
Installing Windows used to require putting the files on a CD or DVD. These days, installing Windows 10 is simple. All you’ll need is a USB flash drive and another computer with access to the internet.
System requirements for installing Windows 10
Microsoft’s system requirements for Windows 10 are fairly relaxed — you don’t need a powerful computer to get it up and running.
If in doubt, here are the minimum system requirements you’ll need:
Processor: 1 GHz or faster CPU.
RAM: At least 1 GB for the 32-bit version of Windows 10. or 2 GB for the 64-bit version.
Storage: 16 GB or more free space on your hard drive for the 32-bit version of Windows 10. You’ll need 20 GB or more for 64-bit Windows 10.
Graphics chipset: It needs to be compatible with DirectX 9 or later, with WDDM 1.0 drivers.
Display: It should support at least 800×600 pixels.
Internet access. While internet access is generally not required for setup, in some rare cases (notably, Windows 10 in S mode), your computer needs a connection to the internet via Ethernet or Wi-Fi.
You should also note that while Windows 10 is free to install, you’ll need to pay for an activation key to unlock all of its features once you get it running
How to install Windows 10
To get the Windows installation files ready, you’ll need a Windows computer that’s already set up and connected to the internet. Once that’s done, you’ll move them to the new computer.
Preparing your installation files
1. Insert your 8 GB or larger USB drive. It doesn’t need to be blank, but note that any content on the drive will be erased during the setup.
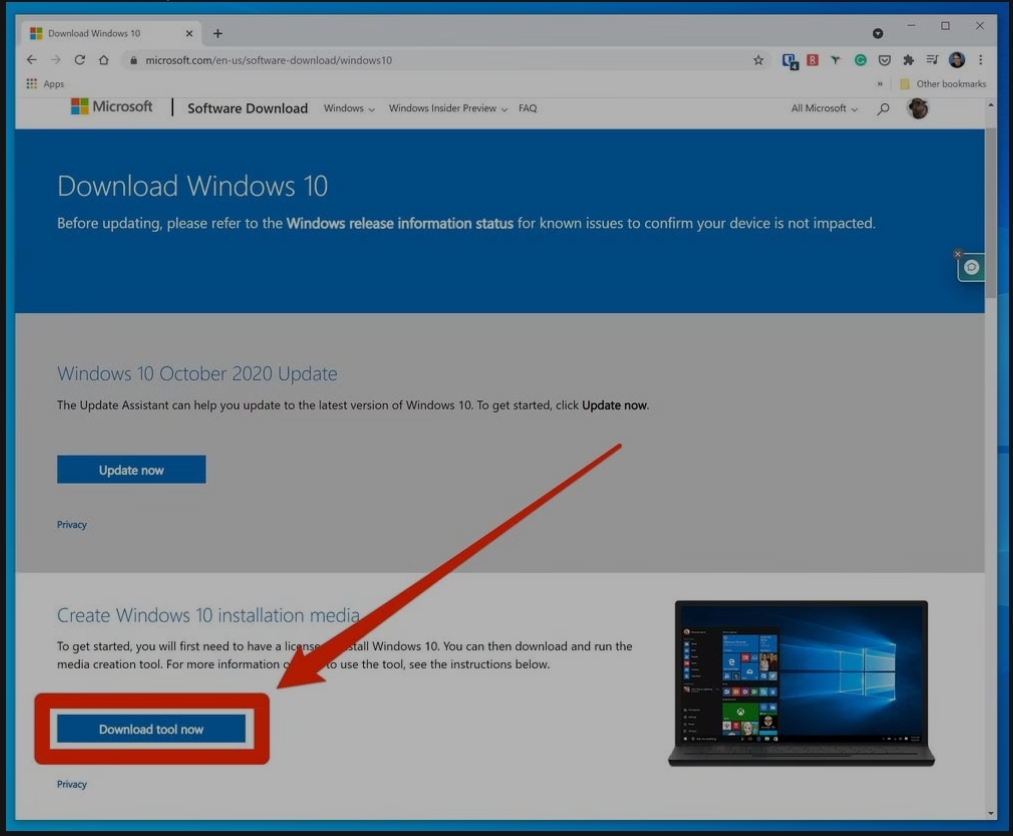
2. Open the Download Windows 10 website in a browser. There, scroll to the “Create Windows 10 installation media” option and click “Download tool now.”
Download the Windows 10 installer to get started. Victor Murphy/Kroon Digital
3. After the software downloads to your computer, run it and accept the license agreement.
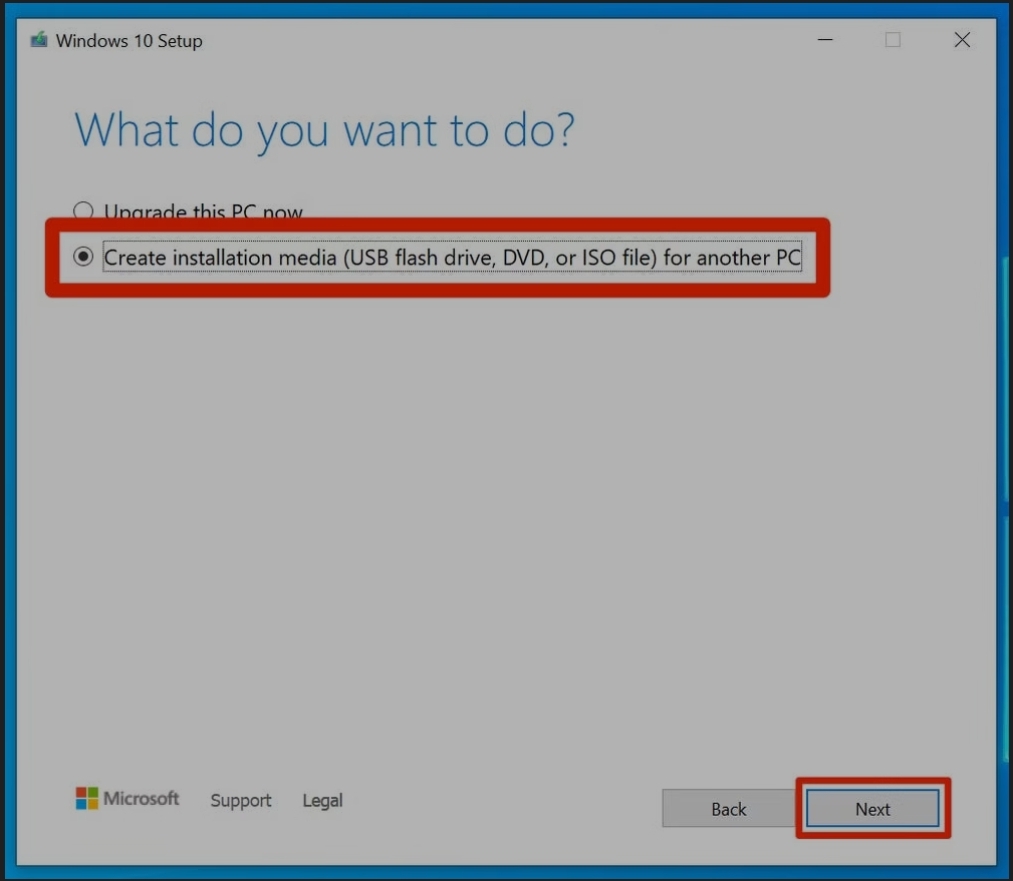
4. On the “What do you want to do” page, click “Create installation media for another PC” and then click “Next” (unless you’re planning on re-installing Windows on this same computer).
Unless you’re re-installing Windows on this computer, choose to create installation media for another PC. Victor Murphy/Kroon Digital
5. On the next page, you can customize the Windows 10 installation settings. If you don’t want the defaults, clear the checkbox for “Use the recommended options for this PC” and then choose the language, edition, and architecture you want. When you’re done, click “Next.”
6. On the “Choose which media to use” page, choose to burn the image to a “USB flash drive.” Click “Next.”
You can also install Windows using a DVD, but it’ll require your new computer to have an optical drive. Victor Murphy/Kroon Digital
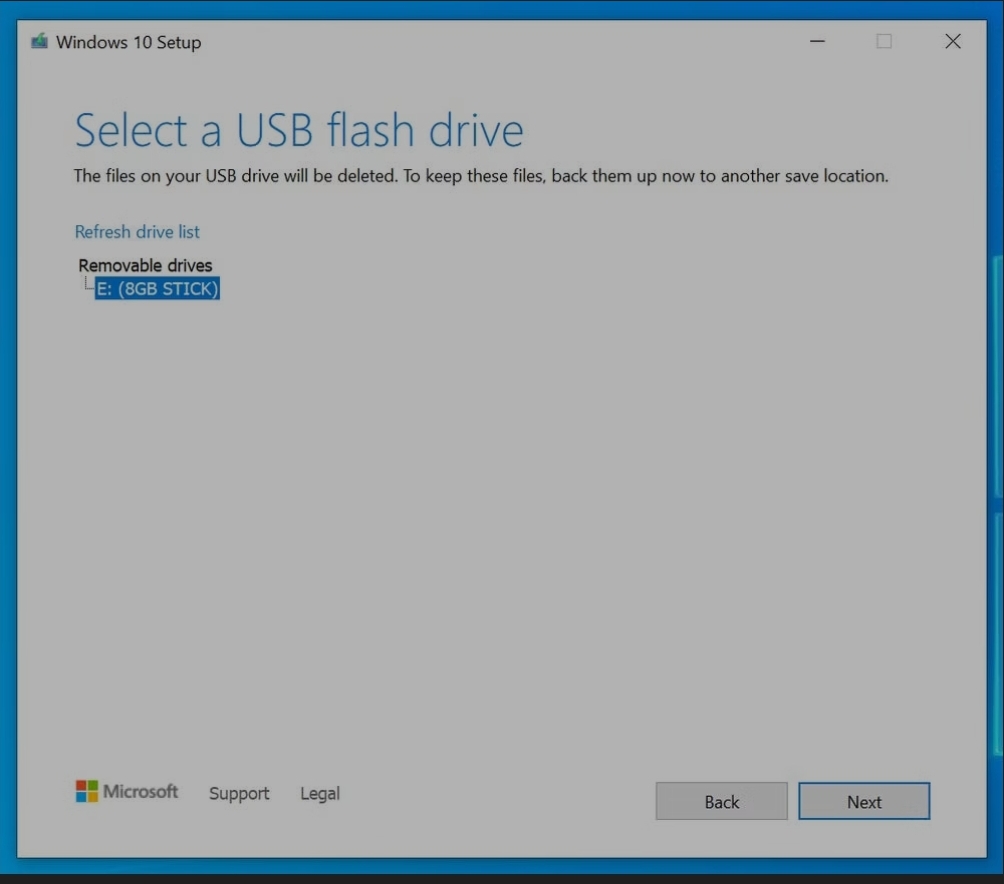
7. Windows should automatically find the USB drive and select it. If you have more than one inserted in your PC, choose the right one, and then click “Next.”
If you only have one USB drive inserted, just click “Next.” Victor Murphy/Kroon Digital
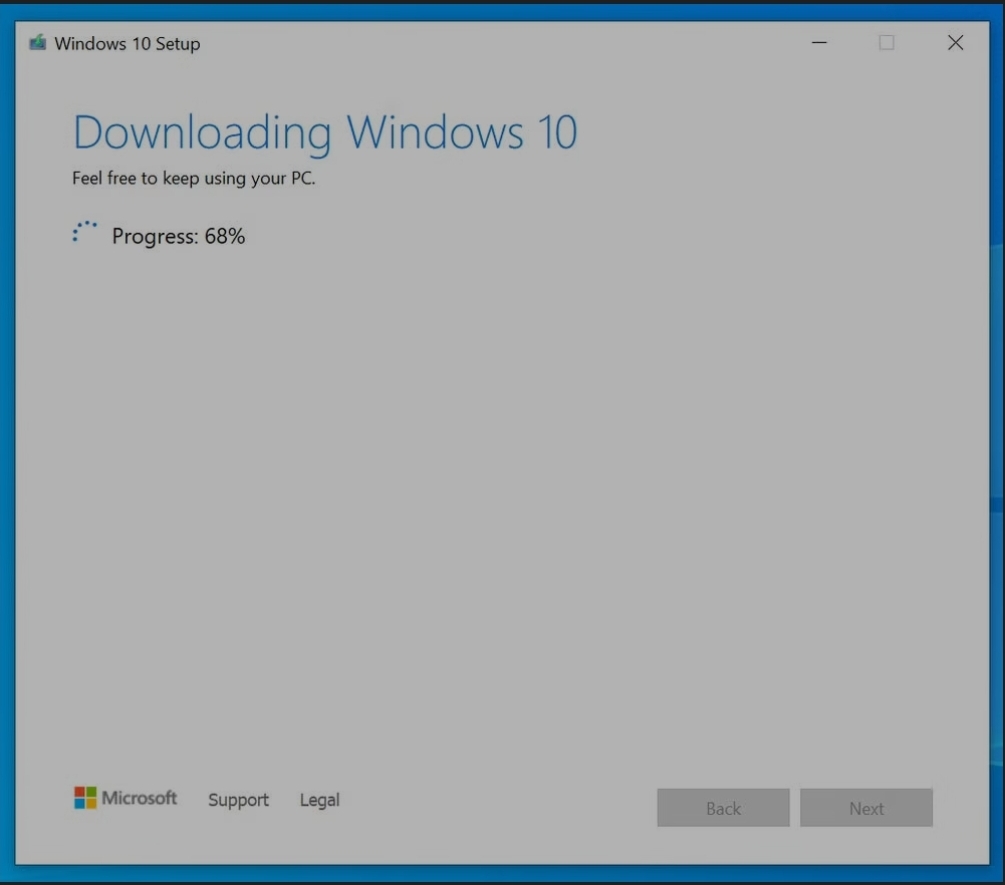
8. The installation files will be copied to your USB flash drive. This will take a while. When it’s done, take the USB drive and insert it into the computer you want to install Windows onto.
It can take an hour or more to prepare a USB drive with installation files. Victor Murphy/Kroon Digital
Installing the files
1. You’ll need to change the boot order so that the PC will recognize the USB drive. Start the computer and press the correct key to launch the UEFI or BIOS controls at startup — this is usually done by pressing F1, F2, Escape, or Delete as it starts.
2. When the startup menu appears, find the “boot” control menu and ensure your computer is configured to boot from USB. Then save the UEFI/BIOS and exit.
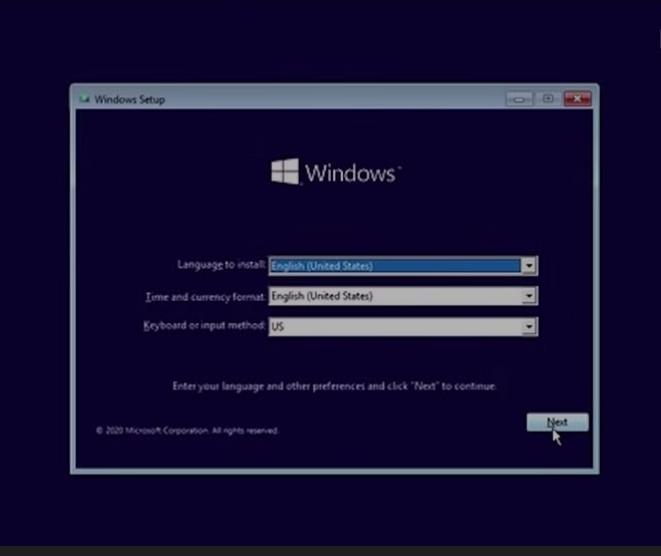
3. When the computer restarts, it should boot from the USB drive and automatically start the Windows 10 installation program. Now you can just follow the instructions to install Windows to your PC.
Once your BIOS is prepared, the Windows 10 installer should load from the USB drive. Victor Murphy/Kroon Digital
4. You’ll need a license key to complete the Windows 10 setup, but you don’t actually need it to get Windows up and running. If you don’t have a key yet, you can postpone entering the key until after the files are installed.
Click “I don’t have a product key” if you don’t have a key, or want to enter it later. Victor Murphy/Kroon Digital
In the meantime, Windows 10 will run in a limited state. Some features will be disabled, but the operating system is still completely usable. That will allow you time to purchase a Windows 10 key.
This post show students and new users how to install VirtualBox on Windows 11 to install guest virtual machines.
VirtualBox is a x64 virtualization software or hosted hypervisor that allows power users or advanced system administrators to set up independent virtual machines on a single physical computer simultaneously.
When you install VirtualBox software in Windows, you can create multiple independent guest computers, each running its own operating system without the need for additional physical hardware or support. This is a great software for sys admins and power users who want to run multiple guest OS without the need for adding new devices.
For example, when you install VirtualBox virtualization in Windows 11, power users can create additional virtual computers inside VirtualBox to run Mac OS, Linux and Windows 11 without needing three separate computers.
With Windows 11 slated for release later this year, VirtualBox will be ready to install it and use seamlessly. Windows 11 will come many new features and enhancements such as redesigned user desktop, centered Start menu and taskbar, rounded corners windows, themes and colors and many more, which will allow users to integrate VirtualBox software and utilize these new features.
When you’re ready to install VirtualBox in Windows 11, follow the steps below:
How to Install Oracle VirtualBox on Windows 11
VirtualBox virtualization requires that the host machine has Hardware Visualization is enabled. Most computers today will have this feature, however it might be disabled in the BIOS. You may have to reboot into the system BIOS and enable Virtualization Technology (VTx) in the system BIOS settings.
Once you enable hardware virtualization, log back into Windows and and go to the link below to download the latest copy of VirtualBox software for Windows.
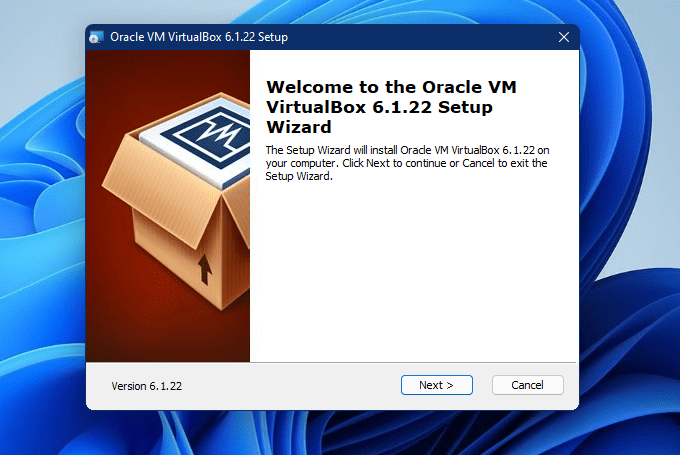
When you run the installer, you’ll be prompted with a installation wizard. On the Welcome setup wizard page, click Next to begin the installation wizard.
Kroon Digital
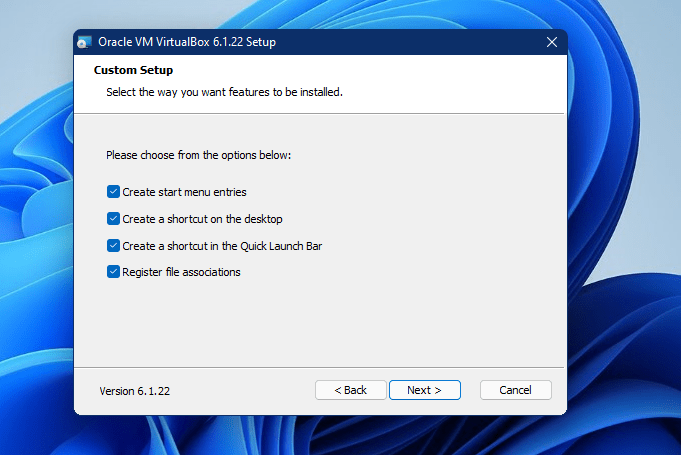
On the custom setup page, you’ll probably leave everything as is and continue. In most cases, you wouldn’t change anything here except for special situations.
When you’re ready, click Next to continue.
Kroon Digital
On the next page, choose from the options presented. This will add shortcuts to your desktop, add menu entries and others.
When you’re ready click Next to continue with the setup.
Kroon Digital
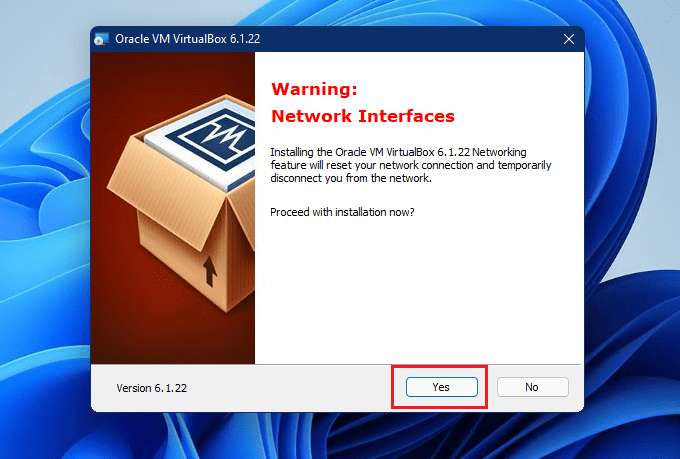
On the next page when prompted to install VirtualBox networking features, choose Yes. Choosing yes will interrupt your network connections briefly.
Then continue with the setup.
Kroon Digital
On the next page, when you’re click Install to begin the installation.
Kroon Digital
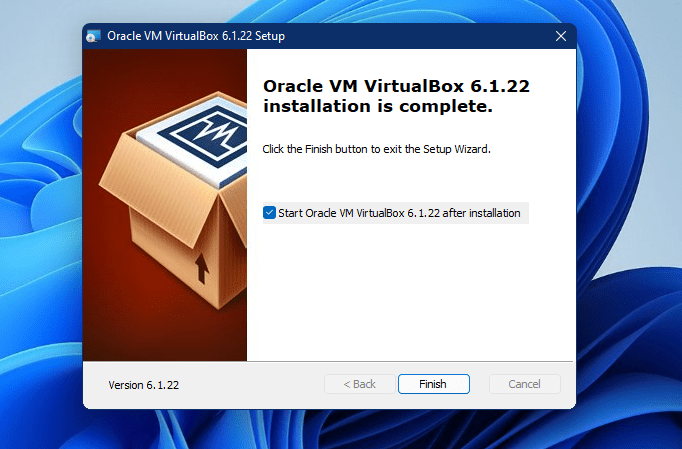
Finally, click Finish to complete the setup. If the check box is checked for Start Oracle VM VirtualBox, when you click Finish, VirtualBox will launch and open.
Kroon Digital
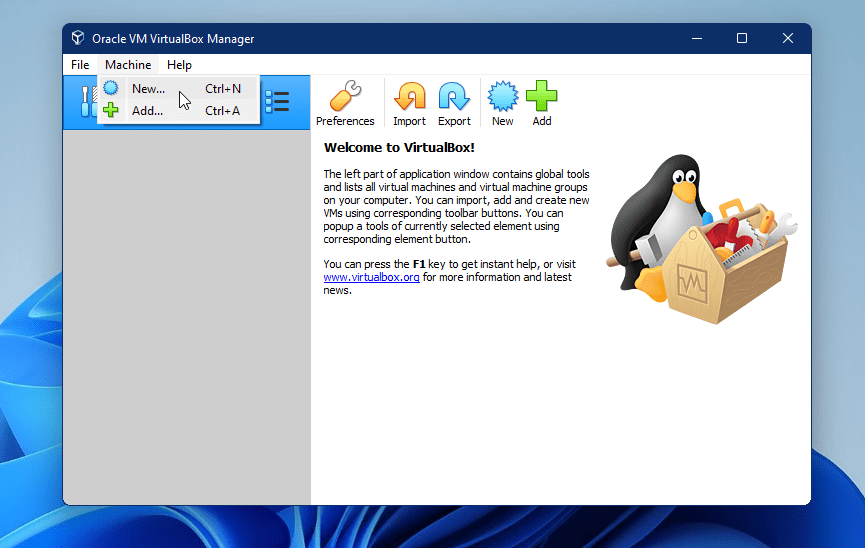
VirtualBox will open up and ready to be used. You can start creating virtual machines at this moment.
Install VirtualBox Extension Pack
Kroon Digital
After installing VirtualBox above, you’ll want to install the extension pack for VirtualBox. You can download the extension pack from the same download page above.
Choose the link to All support platforms as highlighted below.
Kroon Digital
Download and save to your desktop. Then open VirtualBox and go to Preferences ==> Extensions
Kroon Digital
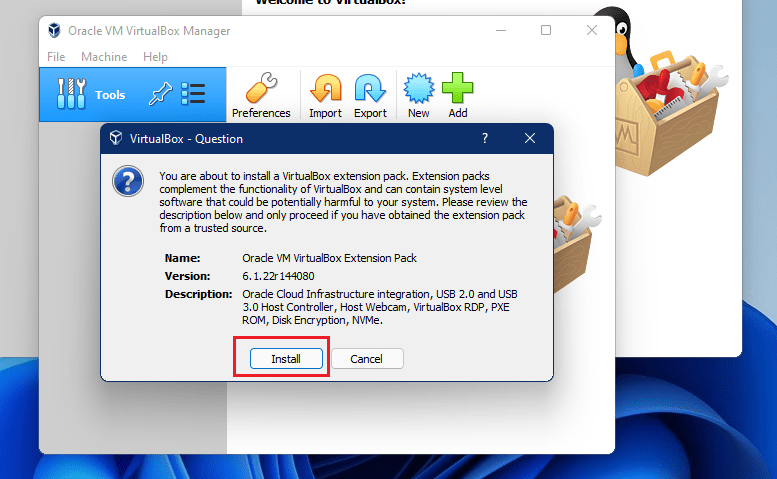
Or you can simply double click on the downloaded pack and it should launch VirtualBox extension packages installation.
Click the Install button to install it.
Kroon Digital
The extension pack extend the functionality of VirtualBox base package. It provides the following enhancements to VirtualBox:
• Virtual USB 2.0 (EHCI) device
• Virtual USB 3.0 (xHCI) device
• VirtualBox Remote Desktop Protocol (VRDP) support
• Host webcam passthrough
• Intel PXE boot ROM.
• Experimental support for PCI passthrough on Linux hosts
• Disk image encryption with AES algorithm
That’s it! You’re finally ready to start creating virtual machines.
Conclusion:
This post showed you how to download and install Oracle VirtualBox on Windows 11. If you find any error above, please use the comment form below to report.